This weekend I brewed a 10 gallon batch of IPA ("Olympic IPA" for the London games...go 'Murrica!) and I thought I'd drop a few thoughts and notes on how things went and talk about the yeast a bit.
There are many variables in the brewing process that impact the final result, but none as important as good healthy yeast. Yeast can provide up to 75% of a beer's flavor profile, so keeping them happy is vital to making good beer. Because they are so important and they are living organisms (well, in the case of a 5 gallon fermenter billions of living organisms) they are one of the most expensive components of a batch of beer.
One way to cut down on cost is to wash and reharvest yeast after each batch of brew. When healthy yeast are introduced into an ideal environment (sweet wort at the right temperature) they will eat the sugar, reproduce, and discharge carbonation and alcohol. When all the sugar is gone, the yeast cells fall to the bottom of the fermenter forming a yeast "cake." After bottling, kegging, or moving to a secondary vessel for other aging or flavor additions, this yeast cake can be cleaned up and stored for reuse.
The basic idea is to keep the yeast dormant, so using sanitized (boiled) water you can collect samples in mason jars. Below is a picture of some yeast that I had washed and stored for a few weeks that was used on Sunday's brew day. Inside the jar you can see a thin layer at the bottom, which is a mini yeast cake, and on top is a liquid of some leftover beer and sanitized water. Just storing these jars in the fridge will keep them at bay for up to a year.
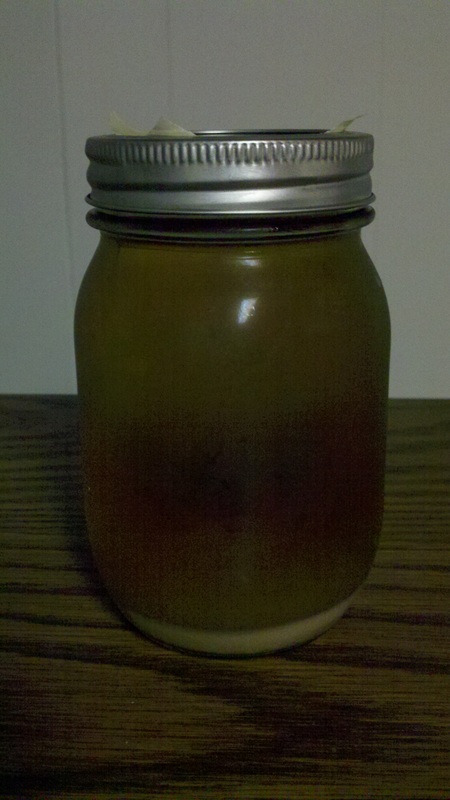
Washed and reharvested yeast. The yeast cells are the small layer at the bottom of the jar.
Now when you want to bring these valuable unicellular party animals back to life, it's a fairly simple process that yields great rewards. The amount of yeast you pitch into a batch of beer can have a huge impact on the results, so you don't want to under or over pitch. 1 pint sized jar (above) doesn't have enough cells in it for proper pitching, so you need to make a "yeast starter." Basically it's making a mini beer with no hops.
First thing is to take the mason jar out of the refrigerator to allow the yeast to get up to their ideal temperatures (mid 60's for ale yeast, mid 50s for lager yeast). While that happens, boil some dry malt extract (DME) in water to get about 1-liter of wort with an OG of 1.020-1.040 depending on the beer and your personal philosophy. Boil the wort for 15 minutes or so, cool, and transfer to a sanitized jug for fermenting. I use growlers from a local brew pub (see picture below), but this can be done in any number of vessels. Cover with foil and let the biology do the rest. The yeast, if still viable, will begin to eat the sugars and multiply to provide a better pitch rate for a full batch of beer.
Depending on when the starter is made and when brew day is can determine how the yeast gets pitched. If the starter is made only a day or 2 before brewing, it's just fine to dump the entire vessel into the batch of beer. If the starter is made 5-6 days ahead of time, it allows the yeast to settle towards the bottom, where you can put it in the fridge again (this bring the yeast all to the bottom) so when you pitch you can pour off the liquid on top and just dump the yeast in. Either way is just fine and works great.
If you use brand new yeast it might take up to 72 hours for noticeable signs of fermentation (bubbles in the air lock), however using a starter can speed up this process greatly. For example I made 2 starters for Sunday's batch, and pitched the yeast around 2:00pm. By 7:00pm both fermenters were bubbling very actively.
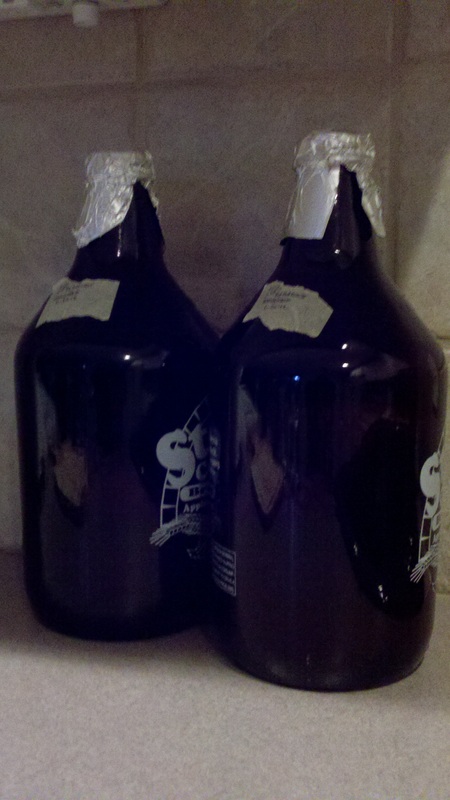
Two growlers, each with a yeast starter for Olympic IPA. 1 mason jar of washed yeast goes into each grower, and each growler will be the yeast for a 5 gallon fermenter.
Alright, so that was lengthy, and frankly pretty vague. I could go into this a LOT more, but I want people to read it and enjoy it rather than read it and get a nosebleed.
Cheers & have a good week!
Cheers & have a good week!
 RSS Feed